History of Editing
Those born in the modern age have the advantage of picking up a camera, filming it then editing digitally in specialized software; such as Adobe Premier Pro and Final Cut Pro. This form of editing has only been introduced in the last 5-7 years, so where did it all begin?
The Creation of Cinema
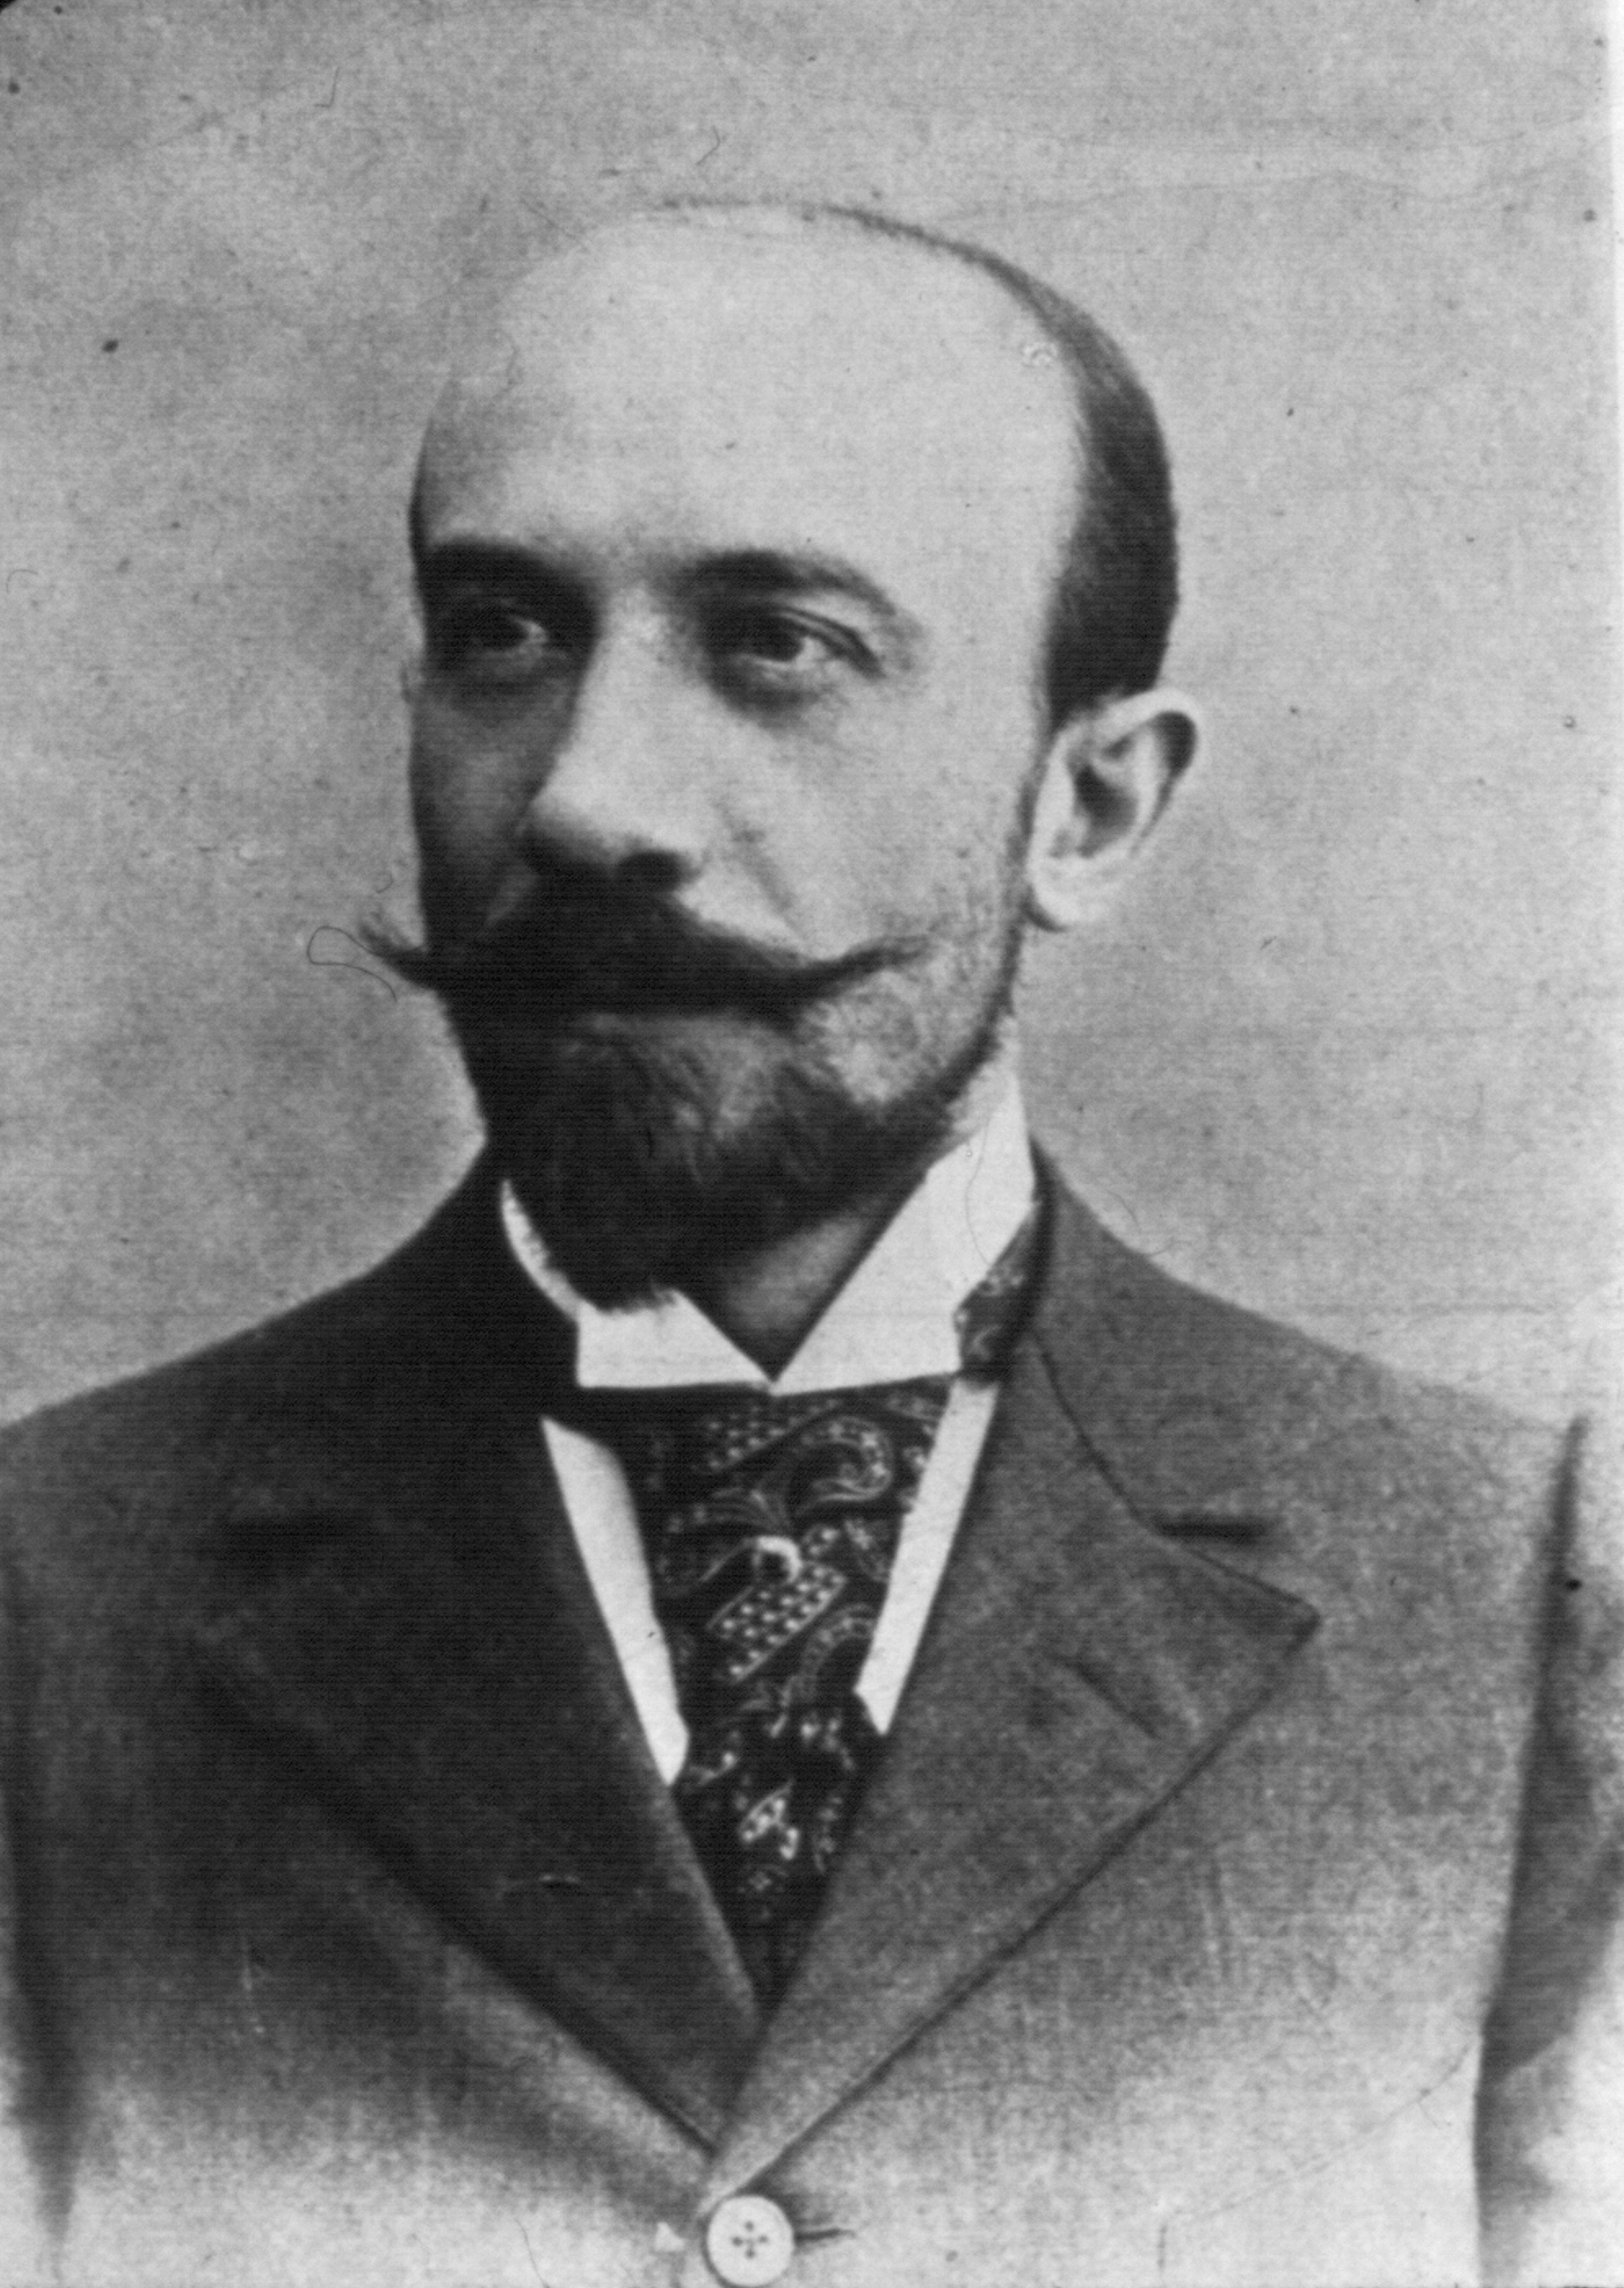
Eadweard Muybridge

(Image from)
Eadweard Muybridge was a english photographer who lived in Kingston upon Thames for the majority of his life. Muybridge is one of the early pioneers in the development of creating motion through photographs (photographic motion) , and early work in the projection of motion-picture. He is known as the "father of the motion picture" and laid the path for modern cinema with his study entitled: "The Horse In Motion"/"Sally Gardener at a Gallop" .This study took place in 1878 at Stanford Palo Alto Stock Farm which is now part of the campus of Stanford University.

(Image from: http://www.stephenherbert.co.uk/mStanfordMemorial.jpg)
Prior to the study, in 1872 Muybridge was given a challenge by a gent named Leland Stanford, who who was the governor of California at the time. The reason Muybridge was hired, was to help Stanford prove that a galloping horse's 4 hooves left the ground at the same time.Stanford believed that horses did in fact do so, however it was impossible for him to judge due to how humans view moving objects; an average human can process 10 to 12 separate images per second.Stanford wanted this proving after a bet was placed, whilst he and his friends were intoxicated.
The prize sum for winning the bet was a total of $25,000. Stanford provided his prize horse, "Occident" for the experiments. The project was delayed for several years due to Muybridge shooting his wifes lover at point blank range. Although he sort of proved the argument in 1872 with a single photo of a trotting Occident airborne.

(Image from)
This wasn't enough for Stanford, who then wanted a study of horses galloping , with the real experiment taking place in 1878. In order to do this, Muybridge placed 12 cameras all facing the same direction. A series of tripwires/string were arranged coming from each camera to form a line, so when the horse crossed the trip wire, the shutter would go off a take a photo.

(Image from: https://www.youtube.com/watch?v=FYKZif9ooxs)
This left Muybridge with a series of 12 images each with the horse in a different position. After watching a series of videos, I found an image from the same video, displaying all 12 images taken by Muybridge.

From this we see that the frames 2 and 3, all 4 hooves are of the ground. Not only did this win Stanford the bet and prove that indeed all 4 hooves do leave the ground; it was a groundbreaking achievement for the world of cinema. This caused a sensation to the public and as humans we started to get a better understanding of motion.
Although, having 12 separate photos by themselves doesn't show us the full movement of the horse. To create a moving image/"film". Muybridge copied the images by turning them into silhouettes.The silhouettes were then placed onto a disc and viewed on a device, a zoopraxiscope, created by Muybridge himself. The machine acted as an early projector as it turned the images into motion for overs to watch; think of it as an early reel of film going into a projector. When the disc was spun, the 12 images blended together to trick the human eye, thus creating the illusion of movement.

(Image from: http://itsallaboutrhythm.files.wordpress.com/2011/09/zoopraxiscope1.jpg)
After printing his 12 images of the horse onto the disc, he finally created what was considered the first ever film "Sallie Gardner at Gallop"/"The Horse in Motion".
(Video link: https://www.youtube.com/watch?v=IEqccPhsqgA)
This film is so significant, due to the fact that it actually contributed to how we see films today. The 12 images can also be known as 12 frames. With 1 image equalling 1 frame, from this experiment 12 frames are put together in one second to create the illusion of movement. Although due to limitations at the time , due to slow shutter speeds, 12 fps ( frames per second) was the base line and did not make motion look fully realistic. In modern times film makers currently use 24 frames per second (with 35 mm films starting to be in 24 fps in the years 1927-1930) which makes movement look realistic, although some filmmakers such as Peter Jackson use 48fps which further adds to the look of realism. Never the less, Eadweard Muybridge discovered the concept of movement which has since been improved by various other pioneers in the filmmaking industry.
(Video from: https://www.youtube.com/watch?v=yfjaObWrgHg)
After Muybridge had his success with his method of photoing the horse, he went on to perfect his method to show movement of other creatures/humans. The improvements consisted of using more cameras and clockworks to set of shutters, instead of tripwires. His total image count comes close to 100,000 thousand images of motion taken throughout his life. The things he photographed ranged from buffalos, to lions, to humans carrying out daily activities and even to women washing each other. Some more examples are covered in this short video:
(Video from: https://www.youtube.com/watch?v=Lm1iVbYns3Q)
The set up used by Muybridge was also an inspiration for the technique of freeze motion, which is related to the technique used to create "bullet time" in the film "The Matrix". As the process used in "The Matrix" uses a series of still images to detach the scene from time and space. In later life Muybridge took photos at different angles to show how some one climbed a set of stairs. Which was the aesthetic opposite to the modern "bullet time".
For a full look at the "bullet time" method check out the video above.
Muybridge's late success greatly affected the industry and paved inspiration for Thomas Edison who introduced the use of high speed shutters to movie making technology. Without contribution contribution, the cinema industry as we know today, could be so much different. Although Muybridge wasn't the only one to help in the cinema industry.
Thomas Edison

(Image from)
Thomas Alva Edison was an American inventor and businessman. He had took inspiration from Muybridge and used it in his work. The main invention in the cinema industry, was his camera/experiment for a future project was the Kinetograph. The design for this was based of an early invention of Edison's, the phonograph cylinder. Which contained a series of small images on the cylinder, when the cylinder was spun the images would create an illusion of movement through reflected light. But was proved to be useless after testing. Edison changed his approach when other inventors in the industry began working on new projects. After the development in celluloid film, Edison started to use them in his work.


(Image from)
Edison hired Dickson to make the concept a reality, although Edison would take full credit for the invention. After a series of experiments the prototype was finally unveiled in 1891, in a National Federation of Women's clubs. The device combined the process of film making and projection, with the projector known as a "peep hole viewer" which allowed people 1 at a time to witness shot footage for themselves. This was then used to produce the first ever film, to be shot in the US, entitled "Monkeyshines No 1 and No 2" which was shot in 1890.
The final product was said to have been completed in 1892. The kinetoscope was described to be an upright cabinet that had the following dimensions: 18 in x 27 in x 4 ft high. On top of the box was a peephole slot with a magnifying lens so the general public could see the film. In the box a long band that was approximately 50ft was wrapped around a series of spools. Under the film was a lamp and the film, between the lamp and film was a revolving shutter containing a narrow slit. So as each frame came under the lens, the shutter created a flash of light so the frame appeared froze. Put together the series of frozen images and a moving image appears due to the perception of the human eye.
(Image from)
The peep show was put in penny arcades and allowed one person to watch short films.
This was similar to a later invention by the Lumiere brothers, however multiple parties (group of people) could all see the film at once using the brothers devices. This design was then patented and set up as a product invented by Edison.
(Image from)
Not only did Edison do this , he set up the patents for Hollywood, the worlds largest film community.
After this patent, Edison filed for a patent on the motion picture camera in 1891 and bought a series of related patent with all his wealth. Edison brought all the biggest film companies in the United States together in 1908 to for the Motion Picture Patent Company/Edison Trust. This became one of the strongest forces in american and meant that producers must pay to use the patented equipment and to pay for a theater license, granting permission to screen their films. The M.P.P.C also banned film credits for movie actors so they wouldn't gain popularity and demand more money. This annoyed movie makers and limited them to producing 20 minute films. All because Edison only wanted the original film makers in the industry, preventing the new film makers full access to the technology. Think of Edison as a big bully stopping all the little guys from doing any thing fun. In the end Hollywood was set up to try and avoid all these patents set by Edison and managed to avoid them by settling in the state of California. This would avoid Edison as he was situated in New York with his film company, "Edison Studios". So if Edison hadn't had set force these patents, Hollywood might not have existed and we could of had a whole different film community.
(Image from)
Lumiere Brothers

(Image from)
Louis and Auguste Lumiere were the sons of the portrait painter, Antoine Lumiere. After a new process in photography had been introduced, Antoine set up a business which made and supplied photographic equipment which was based in Lyons. During this period his son, Louis starting experimenting which the equipment Antoine was producing. After a serious of experiments Louis discovered a new technique which assisted in the development of photography. Because of the success. he set up a factory in the Lyons Suburb which produced "dry plates" using his founded technique. It was estimated that by the end of 1894, 15 million plates were produced.

(Image from: http://www.historiccamera.com/history1/plates.gif)
After the great achievement and prosperity of the factory, Antoine was invited to witness Edison's invention, the kinetoscope. Which was being presented in Paris at the time. What Antoine saw, excited him and on his return he showed Louis a short film from a Kinetoscope. According to EarlyCinema.com Antoine told Louie " This is what you have to make, because Edison sells this at crazy prices and the concessionaires are trying to make films here in France to have them cheaper"
During the end of 1894 the two brothers began work on there own camera/projector system. The main purposes of their work was to overcome the flaws in Edison's designs. With the main flaws consisting of its huge size and the limitation in number of viewers.

Image of Antoine Lumiere
(Image from)
After working throughout winter, the final product was patented in 1895. The final device was called the Cinematographe which combined a camera with a projector and printer. The Cinematographe was a lot lighter and was hand cracked unlike Edison's creation. It could also be moved into different places due to its density. Although, it used a film speed much lowers that Edisons 48fps. In fact the brother device could film at 16 frames per second. This meant there was less movement inside the device so the clatter and grinding that occurred during Edison's device was reduced. The movement scheme within the device came from Louis who used a design similar to how a sewing machine operated. This had a roll of film which had pegs move the film at 24fps on a rotating shutter but you could only record at 16 frames per second.

(Image from)
The first film tot produced on this camera was shown at an industrial meeting in March 1895. The film on show was everyday workers leaving the Lumiere factory. This was the first time anyone had got the chance to be in a film and witness it seconds later. The workers would all rush to view the footage and would be amazed when they saw themselves in the film. Here is footage of the first film made by the Lumiere brothers:
(Video from youtube)
After filming lots of different activities of normal people carrying out everyday tasks, such as bathing in the sea or filming a blacksmith creating a piece of work. All of the hype from the private screenings lead to a public event in the December of 1895; which was in the Grand Cafe located in Paris. This was a milestone for the beginning of cinema, a selection of the brothers work was on display with each film being around 40 seconds long. One of the most famous films shown was "Arrival of a Train"
(Video from youtube)
Because this was the first time for anyone who hadn't saw moving footage. The audience thought the train was coming towards them and caused them to scream and jump in there seats. It is fair to say that this preview was a success and left the audience amazed at what the brothers had produced.
After this ground breaking moment, the rest of cinema/editing history took off and continued to change the world of cinema.
Development in the history of editing
The no edit stage
(link occurs when clicking on video)
Here is lots of examples of early films, that would normal last up to 40 seconds long; without an edit.
In fact the pioneers in film making were scared to edit, they thought if they split up clips and put them with other shots it would confuse the audience. This opinion quickly as film makers found that putting shots into a sequence, it added to the sense of story and helped make complex stories on screen.
Edit in camera
The first types of cuts, were those that are made in camera. The camera operator would stop cranking at the end of a shot, move his camera and begin cranking when he wanted to film again. Instead of moving location, he could of also put something in front of the camera as if something "magically appeared" This type of edit allowed for early special effects and was discovered by a man called. George Melies.

(Image from)
George, who was a magician, was at the Lumiere brothers screening in the grand cafe. He tried to buy a cinematograph for 10,00 francs from the Lumieres. Although they viewed Melies as a threat so the offer was denied. Instead of buying the french device, Melies bought an english device called the, Animatograph. He then modified the device using his knowledge of mechanics and reversed the devices process to make his own camera; and it only cost 1,000 francs. A couple of weeks after the screening, Melies had turned himself into a filmmaker and showcased his films during his magic act.

(Image from)
In 1896, whilst out filming the film in his camera jammed after shooting a bus coming out a of tunnel. After sorting the jam, he began to crank his camera again, although the bus had gone and a hearse replaced the bus. After the shoot, he developed the film and witnessed that the bus had turned into the hearse as if it was a special effect. Melies had also did this to turn men into women, on screen. This technique got given the name of a "jump cut" which Melies started to use in his work. It seem that his favorite time to use this was for appearing and disappearing people. I.E dropping a smoke bomb and poof, your gone. Here is an example of this being used in his film, "The Temptation of St Anthony"
(Link in clip)
Melies also founded other techniques, including: fade in and out, overlapping dissolves and stop motion photography. This moved the cinema industry on from having 40 second single shots, into an overall story being told through. Although his films were shot at the same angle and appeared more as a stage show, in turns out that after all his films he never moved the camera once. In one of Melies famous movies, " A trip to the Moon" a series of pulleys and mechanics were made to make a rocket go into the eye of the moon. If he decided to move the camera instead; it could've saved a lot of time and ease.
(Link in clip)
Another prime example of a film being edited in camera, was " Life of an American Fireman" directed and produced by Edwin S Porter. Which shows lots of overlaps in time because there was no idea of the language of cinema as it was still being created at the time.
(Link in clip)
Because there was no idea of time, lots of the same actions are repeat. For instance in one shot we see the fireman go down a pole, but in the next we witness them doing it again but from the outside. There was no cohesion or continuity and it made the film unrealistic. For more information on Edwin S Porter and continuity skip to the "Conventions of editing" section.
By hand

(Image from)
The Moviola

(Image from)
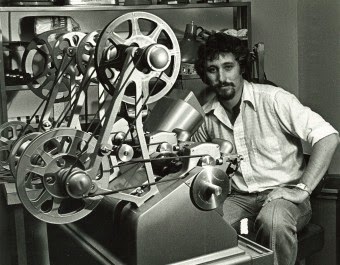
(Image from)
You could then find the area the wanted from the film and mark it using a stamp like mechanism. This makes a little indent in the clip where you can then mark with a pen. Also located on the side was a crank (or foot pedal) so you could review your footage with reeling forward playing the clip and vice versa. After you have marked the clip you would pull the footage out so it is easy to move and would place the footage onto a splicer which had 4 prongs. A lever could then be pulled which would bring down a razor style blade which would cut the clip. You could then put the two clips over the 4 prongs and fx the new edit with some tape. This was very similar to cutting by hand, but by having a machine hold/store the film whilst you could mark where to cut, meant it was easier to operate. Especially when you could see your footage without having to hold it up into the light.
(2:43 onwards)
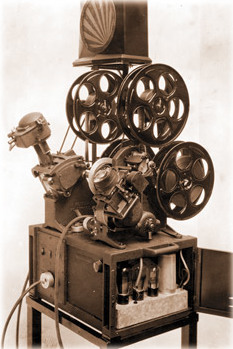
Steenbeck

Steenbeck, is another brand that has become known for its film editing machines, they were founded in the early 1930's although the machines were not released until years later,1953 to be exact.Instead of producing vertical machines, Steenbeck produced a horizontal flat bed editing device. This became the popular choice to edit on in the 1970s and replaced the use of the Moviola . Moviola's are still used to this day in Hollywood and are kept in one of the original cutting room floors. Steenbeck flat beds could used both 35mm and 16mm film.

(Image from)
You'd start the editing process by placing your spool of film onto one of the plates. You'd then turn the device on, at the switch. Then place your film through a series of editing rollers which were often made out of nylon; which was that soft it didn't damage the original film.

(Image from)
When passing through the rollers, the image would be projected through a series of mirrors onto a screen. The device could also pause, and control the footage (I.E whether to fast forward or rewind). After finding it on the screen, the editor would then remove the tape and find that frame in the film.Once the editor had found the clip he wanted, he would mark onto the film with a grease pencil you you. Then you would splice the footage back together with tape. Which is very similar to the final process when using a Moviola. There was various variations over the years on the Steenbeck, some that start off very basic, until those that started to use monitors to display the footage.
Here is some footage of a woman cutting on a Steenbeck device.
Films such as "American Graffiti" and "The Rain People" were edited on the Steenbeck.
This would take forever, but was the best editor around for a long time. This was however, came to an end with the introduction of NLE/ Digital film editors. There was no longer a need to spend hours going through clips, marking them with a pencil, cutting them physically and sticking them back together. Within seconds you could do all of this with a mouse. Although the company still produces the flat bed editors today.
The Path To The Digital Age
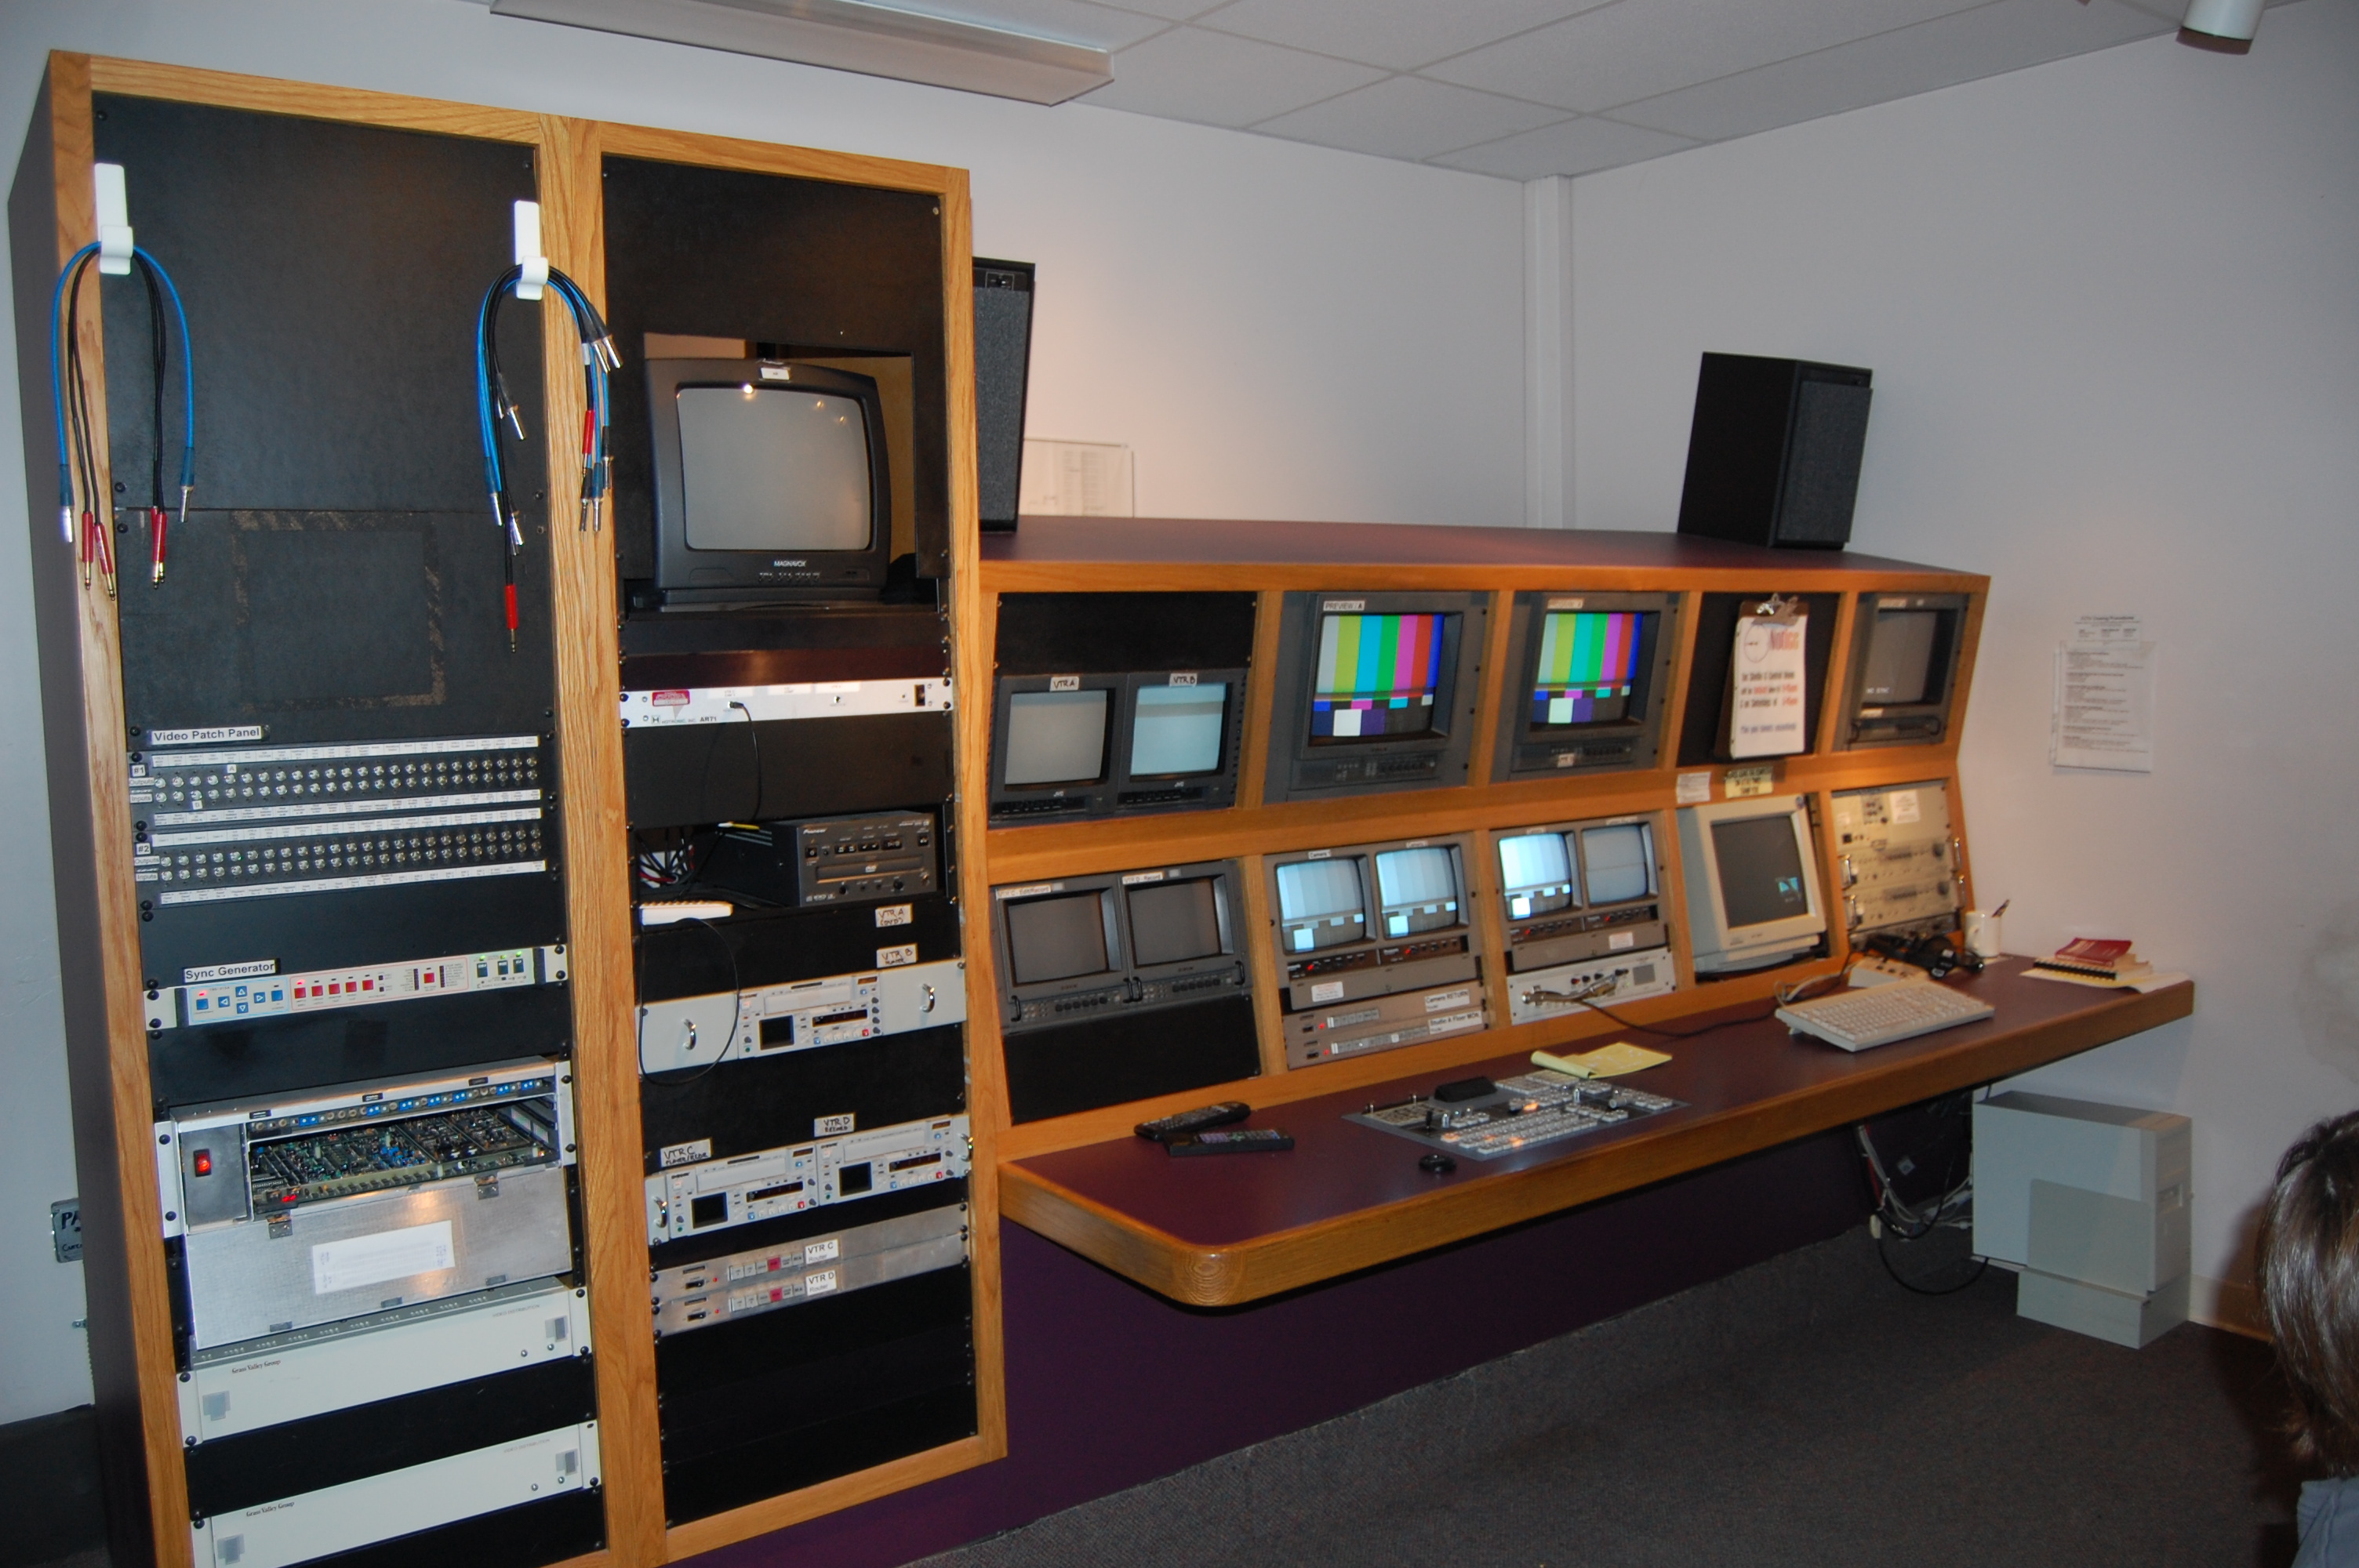
Although the real development towards the digital age of editing came from the broadcast of television. The first ever commercial broadcast (programme aimed to make money) aired in American in the late 40's . early 50,s. And by 1954 TV was in great demand, in fact TV was using more raw film stock in their kinescopes than all the films produced in Hollywood at the time. It was a ground breaking time as everyday people could watch TV shows and news in their houses. Shows were cut live using a multi camera setup, which is controlled by a master control board; a set up that is carried forward today.

(Image from)
This all had to be done live as it was impossible to film a tv signal at the time. The only way to edit was to delay the broadcast. A key example would be delaying the broadcast for a different time zone in the country, I.E in the USA you might "record" the TV broadcast in California but hold it back until later on for New York which are 3 hours apart.
This process was used with a kinescope, which in short was a video camera that focused on a monitor. The basic idea was to film the monitor as the show was being broadcast, which is a simple idea, Although it produced images that were off centre and position and created an unwanted effect called "ghosting", which produces motion blur.

(Image from)
Here is an example of a TV show, Ernie Kovacs "Silent Show" which was recorded on a kinescope.
From the clip we can already see that the quality isn't great. The ratio of the clip is also very square shaped, as it would be the size of the TV/Monitor it recorded off.. It was also really expensive to produce this method, so a cheaper format was needed.
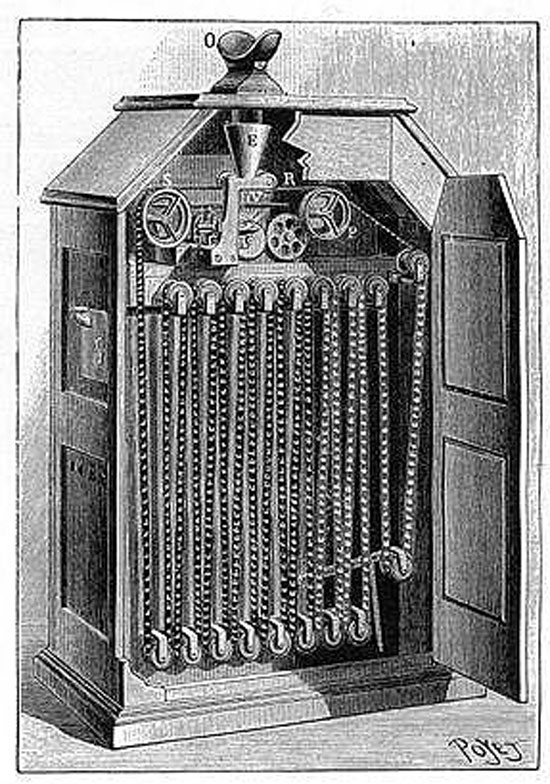
The Introduction of Tape
The tape used was magnetic, which had been used in the past to record audio. It only recorded audio as it was an immense struggle to get an video image onto the magnetic tape. In 1951, the Bing Crosby Production company were the first people to get an image onto the tape. However, the image quality was hideous.
5 years later, Ampex (another production company) brought out the publicly available tape recorder the 2 Inch Quadruplex video tape. Which would now make tape the standard for TV for the time being.

(Image from)
The image above is from the West Coast delayed broadcast which was released on 30/11/1956 by TV company CBS.
It was possible to edit the first versions of the Quad tapes and followed a similar trend to cutting film, although it was even harder to do. Before you could view the tape is needed to be developed, which used fine iron filings dipped in a deadly solution of Carbon tetrachloride. Which is a see through liquid that is toxic , carcinogenic and a pollutant. This made the bands on tape visible under a microscope. You could then line the tape up with a splicer to be cut, although the audio and video would be out of sync. To fix this you would cut the video first with some of the audio, then copy it back into place. This was very hard to do as magnetic tape cannot hold still frames
Here is an example of someone who is editing magnetic tape together, who explains the process in more detail.
(1:40 onwards)
This guide focuses on editing after the development of the tape/audio but still follows the process of how you would splice footage together using a magnetic tape editor.
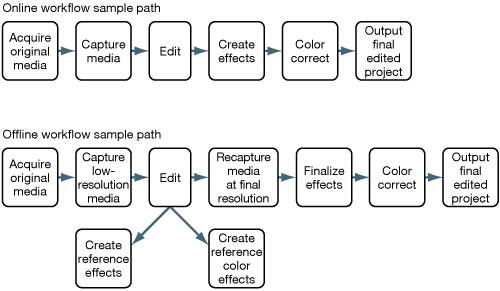
TV company, NBC got round the problem of matching the audio to video by going back to the kinescope method. To edit a show NBC would use prints containing cues in the audio which could then be matched back with the video in the editing process. This became known as the Editors Sync Guide or "ESG". Which is the very similar to a process used in digital editing, offline editing. Which uses lower file quality (the copy of the raw footage) in the edit, so when you come to prepare to export/render the footage it is assembled back to the high quality based on the edit. The modern offline editing is done in the non linear editing software and makes the process a lot quicker than methods such as tape to tape.
.jpg)
(Image from)
This diagram explains that instead of taking in the huge files like an online edit, offline reduces the file size and creates references which will be fixed later on. So after the edit in an offline editor it will bring the file size back to its high quality and finalize the effects with the references.
Linear Editing
After video another editing technique was being developed. The linear edit. It was discovered that if you used a video deck containing the source of the footage, you could move a cut to another deck, known as the master deck. This would then start to build up a series of cuts in a linear fashion, hence the name. But because it was on a deck you couldn't undo a take a piece out. The edit must be decided before had as once you start the last shot cannot be changed without starting again.

(Image from)
The image above, gives a visual representation of the last paragraph.
Before the linear phase of editing truly got underway, a few founding machines were needed first. The first one was the Editec by Ampex released in 1963, this was another tape recorder that used electronic components that could control in and out points created by the spikes in tones of audio.

(Image from)
Shortly after this came another useful advancement in linear editing, helical scan systems which were devices that had tape wrapped around a circular drum in a helix fashion. This added more bandwidth (number of bytes per second) so you could pause the tape and see what's in each frame.

(Image from)
Then in 1967 the SMPTE timecode came along. Which was introduced by the US, Society of Motion Pictures of Motion Picture and Television Engineers. This feature meant you could find any frame within your footage. Each frame within the footage was given a location. Which was broken up into 4 sections.

(Image from)
This made editing a lot easier as you could find a place you wanted to cut exactly on the spot, without checking through every single frame and remembering which frame you needed to cut at. This feature is also another we carry forward into modern editing. At the time, you had to follow the strict codes of linear editing otherwise your final product would be rubbish. But because you had to follow such strict rules, editors lost their creative flair.
You would have to manage large EDL's, which are edit decision lists. Which had the information on the in and out points of clips you were taking from footage. Again any changes made would mean starting at the beginning again so you needed to be really careful were to place clips. This meant there was no such thing as a rough cut, as the cut you made would be permanent. It is argued in modern day that linear editors are better editors as they had to deal with this process and think before they put clips together. This was the only way to edit video tapes. To edit creatively you needed to go back to the old process of film.
Non Linear Editing
Alongside linear editing was non linear editing, which is the complete opposite. In non linear editing systems you can control the order of the clips ; if you wanted to change a clip or modify the sequence of clips, you could easily do so using the copy and paste features within the NLE software/machine. NLE allowed editors to start using their creativity again alongside making the editing process a lot easier and more effective.

(Image from)
As you didn't need to copy footage from tape to tape. All you needed was to put the footage onto a computer, and upload the footage into a NLE software/machine. Once you were, you could drop and drag clips into a sequence whilst maintaining the original footage. This meant there was no "generation loss" (Losing quality each time footage is copied) . Also, because you could manipulate and change the footage as much as you like, NLE is non destructive. This type of editing was computer based and moved away from using machines such as the Moviolas, Steenbecks and video tape recorders.

(Image from)
But as for any other development in editing, it took time to reach its full potential. As all NLE systems require good computer power and masses of data storage, to function effectively . The first ever NLE device was a CMX Systems product released in 1971, the CMX 600. The device were commonly used to store 30 minutes of digital data at a time. The hard drives were the size of washing machines and had 2 built in monitors. The right hand side monitor would play a preview, so the editor could make cuts and editing choices; whilst the other monitor displayed the edited version of the footage.Due to its limitations the device was best suited for offline editing. They cost around $250,00 which is now worth over a million today. Here is an advertisement for the release of the product.
Throughout the 80's there were a series of NLE being produced, but the real wait was for the power of computers to catch up. One of the experimental products during the time was the EditDroid created a spin off company by George Lucas, Droid Works. It used a series of multiple laser discs containing the same raw footage, although this didn't work out and resulted in the company closing.

(Image from)
In 1988 Editing Machines Corp, introduced the EMC2. Which was a PC based NLE that used optical disks for storage and playing back footage. The EMC2 wasn't as groundbreaking as other devices, but started to pave the way for other PC based NLE's. Here is a 9 minute clip going into the full detail of the EMC2.
Avid
After years of build up , we start to look at the technology that paved the way for current means of digital editing. Which has only just took shape in the last 5-7 years.
A year later, Avid made the Avid/1 publicly available. The Avid/ 1 was based around an Apple Macintosh II computer, although the hardware and software were original to Avid. Avid went on to become the standard for hollywood films and to this still produce software used in television and film. Although the storage on the Avid/1 wasn't the best and only adverts and music videos could be produced on them. It wasn't until the future of Avid that they really got going. With one of the most popular softwares amongst the 3 commonly used: Avid Media Composer, Adobe Premiere Pro and Final Cut Pro. All of which still compete to this day.

(Image from)
People often go for Avid Media Composer as there editing software choice, as they either grew up using it or because of its layout and ease of use. For a full list of reasons check out the link. The video below, is the demo for the Avid/1 which shows its ease of use and resemblance to editing software today. As the Avid/1 began to make use of the timeline, edit preview, video preview and other features covered in this guide.
By the end of the 1980's/ early 1990's Avids products began to replace all the old fashioned tools such as the Moviola and flat bed editors. As they allowed the editors to create films with greater ease. In 1993, Avid produced an editing machine that had 7 terabytes of storage, which could cope with editing a feature length film. The first feature film ever to be edited on an Avid was "Let's Kill All the Lawyers" directed by Ron Senkowski. Also, the first ever studio film to be edited at 24fps was "Lost in Yonkers" directed by Marth Coolidge which was also edited on an Avid.

(Image from)
Although there had only been 3 films using the NLE method and in 1995 more and more people began switching to Avid machines for editing. Which started to imply that celluloid films were no longer needed. In 1996 , the editor of "The English Patient" , Walter Murch, won an Academy Award, with the NLE system used being an Avid.
Avid is still used to this day, with the majority of feature films released with have been edited on an Avid Media Composer. Here is a table of a series of films that have used Avid software to edit/ compose music for the feature length film.

(Image from)
The sheer amount of well known movies on the list highlights the great success in the development of editing. Not is it a massive difference from the first films ever produced, the software came about after hundreds of years full of pioneers and designers working together. The current stage in editing is NLE, but for all we know another style of editing could still be developed in the future.
Since the creation of the Avid/1, Avid has gained rival companies. With software being produced by Adobe and Apple to compete with the Avid Franchise. The well known softwares known today are Adobe Premiere Pro , Final Cut Pro and Avid Media Composer. This put pressure on Avid, so as storage became cheaper and cheaper, so did the Avid machines in order to stay ahead of the game.We have already looked at Avid, so lets take a look into Final Cut Pro.
Final Cut Pro
After the introduction of the Avid, a company called Macromedia wanted to enter the game of NLE.To do this they hired the lead designer ,Randy Ubilos,who worked on Adobe's NLE system -
Adobe Premiere.

(Image from)
They wanted to create a program called "Keygrip" which would take influence on the code used in Apple's software, quicktime. The product was well into its way of being developed when they realised they couldn't release the software. This was due to the fact they had license agreements with microsoft and true vision which would be broken if they brought out the program.
Instead of scrapping the program, Macromedia went out to look for a buyer and changed the name from key grip to final cut. They found one in a private demonstration , at a NAB exposition (National Association of Broadcasters) in 1998, it was bought by the one and only Steve Jobs the owner of Apple. The following year the program was released as Final Cut Pro .

(Image from)
After losing market shares in Microsoft, Apple offered the users Adobe Premiere a free copy of Final Cut express or a discount of $500 on Final Cut Pro, in order to try and sway them over the their programs.
Here is a video tutorial on basic editing skills, in Final Cut Pro. This highlights the ease of use for older film editors but for new filmmakers this will be totally new for them. The tutorial also covers the key features of Final Cut Pro in a nutshell.
In 2001, the studio motion picture " The Rules of Attraction" was edited on Final Cut Pro 3 and proved that off the shelf software is capable of editing feature films.
Here is part of a list, containing all the films were Final Cut Pro was used.

(Image from)
Even though this section wasn't as big as Avid, it still covers the same areas. As most NLE software today all follows a similar trend. According to a 2007 SCRI study 49% of the professional editing market in the USA uses Final Cut Pro.
Premiere Pro
Up until August the 21st 2003, Premiere Pro was know as Adobe Premiere and had 7 versions before changing to the new title. During those 7 titles the platforms it was on changed randomly going from Mac to Windows up until Adobe Premiere 5.0. The first versions of the programme were designed by Randy Ubillos, who left the company after version 2 to create keygrip, which later turned into Final Cut Pro.

(Image from)
Below is a video, showing how easy it is to do a basic edit in Premiere Pro. This is also very similar to the other two programs, with the only difference being the layout and some of the features:
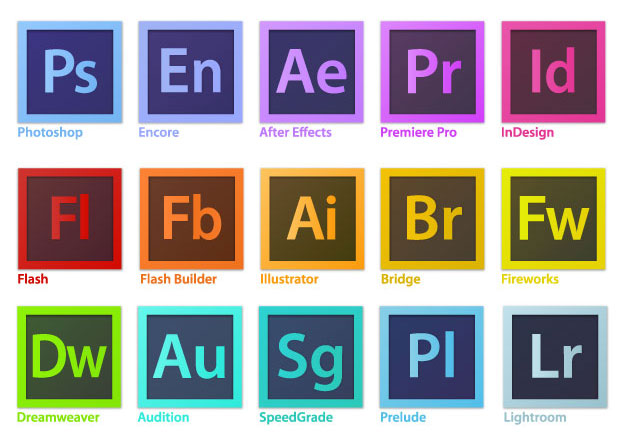
The uniqueness to Adobe Premiere Pro is that there is integration between other adobe programs. Photoshop files can be opened from pro and when updated and saved, will update the file in Pro. You can also import compositions from After Effects into Premiere Pro and vice versa whilst maintaining file quality. Last of all, you can also send sound effects and ambience sound over to Adobe Audition to be mixed and designed. This can then be saved as a track and sent back into Pro to use. In fact most of the C6 collection has some sort of interaction with Premiere Pro.

(Image from)
Premiere Pro hasn't been used as much for editing feature films compared to the other two competitors. Here is a list of film edited in Premiere Pro:

(Image from)
Lets take a look at the trailer for one of the films edited, Gone Girl. Which was a 2014 thriller directed by David Fincher and starred Ben Affleck and Rosamund Pike.
Personally, I prefer to use Premiere Pro as I find it easy to use and is what I am comfortable with. Although, once you learn to edit on one type of software you can apply the same skills to everything else. But which software is the best?
Premiere Pro V Avid Media Composer V Final Cut Pro
(information from)

(Image from)
All of software has there only strengths which we have look at individually. The big 3 A's in edit Adobe, Apple and Avid are the best choice of editing software and have been since they were developed. If your on a budget then,: Final Cut Pro X is for you as its a one off payment costing $299.99,; then you have Avid Media Composer for $999 and coming up as the most expensive, is Adobe Premiere Pro which is part of a collection for $1899 or a subscription per month of $49.99.
Apart from budget, its your own choice as all of them can do a basic edit very well. It all depends on how you use the software and how you like to edit. There are loads of views on what the best software is, when in fact there all as good as each other; otherwise they still wouldn't exist. To sum up, I will use this image comparing Final Cut Pro and Premiere Pro:

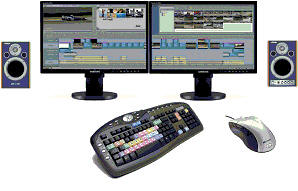
Although these programs didn't really shine until 5-7 years ago. This was because of the great development in computer technology. Computers were becoming faster and storage was increasing, not only did it mean it was cheaper for the big industries, everyday people could buy a computer for editing. Instead of paying $250,00 for a basic machine that wasn't that efficient at editing, you can now buy computer for $4,000 solely for editing. Which comes with 2 screens so you can easily work on different tasks and immense processing power, so you can work with larger files. There is no longer one set company producing the machines, as all computer production companies will produce a PC that is capable of editing.

In this part of the guide we've travelled back in time to an era without cinema, and journeyed from the creation of cinema, to the development of editing. Who knows what's in store for the future of editing, all it will take is another great advancement in technology.
For a video guide for the following above, check out this YouTube video:
(information from)
(Image from)
All of software has there only strengths which we have look at individually. The big 3 A's in edit Adobe, Apple and Avid are the best choice of editing software and have been since they were developed. If your on a budget then,: Final Cut Pro X is for you as its a one off payment costing $299.99,; then you have Avid Media Composer for $999 and coming up as the most expensive, is Adobe Premiere Pro which is part of a collection for $1899 or a subscription per month of $49.99.
Apart from budget, its your own choice as all of them can do a basic edit very well. It all depends on how you use the software and how you like to edit. There are loads of views on what the best software is, when in fact there all as good as each other; otherwise they still wouldn't exist. To sum up, I will use this image comparing Final Cut Pro and Premiere Pro:
(Image from)
The only key underlinings is that Final Cut Pro is only available for Macs and isn't good for plug ins. Whilst Premiere Pro has bug issues and crashes and is expensive to purchase. Although neither of the red/bad areas are in each others green zones so they can't one up each other on that front. The rest is unique to the software, so if you are comfortable using Premiere Pro stick with it as all 3 programs can complete similar tasks.
(Image from)
In this part of the guide we've travelled back in time to an era without cinema, and journeyed from the creation of cinema, to the development of editing. Who knows what's in store for the future of editing, all it will take is another great advancement in technology.
For a video guide for the following above, check out this YouTube video:
The purpose of editing
After going through all the hassle over the past couple of years , why do we edit? Some people think that the only reason we edit is to remove all the waste material. This may be true, but editing is much more significant. By editing shots into a specific order tells the audience a story, which fully engages them into the movie. There are many purposes of editing, purposes such as:


After going through all the hassle over the past couple of years , why do we edit? Some people think that the only reason we edit is to remove all the waste material. This may be true, but editing is much more significant. By editing shots into a specific order tells the audience a story, which fully engages them into the movie. There are many purposes of editing, purposes such as:
- Telling a story/Creating drama
- Relating audience engagement to genre
- Motivating the audience
- Engaging the audience
- Generating Pace
- Turing shots into sequences
- Creating a sense of time and space
- To express character emotions
A good film will make the editing appear invisible and should fully engage you/the audience in the film. When we place shots in a row we form a sequence, when done correctly we don't realise they have been put together as it flows together nicely. This can be applied as one of the main purposes as with putting shots together you won't end up with a final, good quality product. This means you have to be aware of what your putting next to each other, in order for it to make sense to the audience.
If we look at the big sections individually we will see fully how editing has a purpose.
Telling A Story/Creating Drama
In every film, editing assists to set up 4 dimensions of film narrative.By choosing the order you receive information about the story arc/plot, how much plot details you are meant to receive. How your suppose to feel emotionally relating to film events and characters; and the pace you go through in the overall story of the film. A good edit can tell a story without the need of sound or narrative and a excellent example is the famous "Trio" scene from "The Good, The Bad and The Ugly". I will breakdown the scene and talk through similar concepts covered in this video. (For reasons only the link will work)
(Image From)
Throughout the scene the editor puts together a series of shot variations to help tell the story and intensify the drama. A couple of editing conventions (All of which will be explained later) are put to their full use in the scene which further develops the realism in the story. The first shot we see is:
(All images from video link above)
The first impression of the shot is that trio are not on good grounds as the positioning is far apart and the shot type is wide. This along with the next shot act as the establishing shot for the scene, giving us the location of a graveyard along with the 3 main characters.
It is then cut to an extreme wide shot, which is large than the previous shot. This also how the scene ends, with a extreme wide shot after the shoot out. The whole event could of been shown from the same shot, although the director (Sergio Leone) mixed up the shots to create a masterpiece. Altogether in this scene ,2 1/2 minutes worth, there are a total of 65 shots, with each one being vital in there own way.
After the establishing shot we get 3 mid shots, one for each of the main characters. They are all linked in the same way, due to have having matching eye lines. In normal terms this means what a shot of what a character is looking at comes next after the character shot ; in this case Ugly is looking at Bad and Bad is looking at Good.
The matching eye line is then used throughout when using a variety of shots. The character that comes next isnt random and has been thought out. This pattern is that the character that was last in the previous chain of shots comes first in the next until they have been at the front and back they are then in the middle of the chain. Each type of shot creates different emotions and feelings than the others. The over the shoulder shots reveal the distance from the characters and how far away they are from each other. The close up of the weapons tells the audience that at any moment somebody could pull of the weapon and kill one another. Which in turn creates tension within the audience. The use of the close ups then reveal characters feelings within the situation. For example in this case, we see Good as extremely confident as he has his arms by his side in a relaxed state, with his hand away from his revolver. His facial expressions also don't reveal signs of any panic and is casually still smoking his cigar. Although, without the use of editing , we wouldn't of got any of the main story.
Although, there is lots of hidden detail within the construction of shots in the edit. This is seen through the number of close ups each character gets.
In total Good and Ugly get a number of 7 shots each, making them "equal". Good already knows the outcome of the situation so he does not appear panicked. Ugly on the other side doesn't so his close ups show his panic and confusion. Good and Ugly are also linked by having Goods close up first and then Ugly. Each time the eye lines get closer and closer, as if they are looking directly at each other. This further makes them equal and alike, suggesting they are going to escape the shoot out alive as they are working together. However, Bad gets a total of 11 close ups of him and his gun. This must mean that in this scene Bad is more significant as more attention is on him. Since we found out that the others are equal, it is clear that Bad must shoot first; which will result in him losing. This claim is supported by the fact that we see more close ups of Bad reaching for his revolver.
Not only did this clip reveal how we can tell a story without using sound, we find out what the characters are thinking through expression and where they are in terms of time and space through the use of editing. Fully summing up why storytelling is one of editings purposes.
Matching Engagement to Genre/Engaging Audiences
(All clips used in this section , comes from youtube. When double clicked on will take you to the channel owner)
When creating a film, the job of the editor is to edit the footage in an appropriate way which enables the audience to clearly understand the movie/narrative . To do so the editor has to include a beginning middle and end to make the plot cohesive and understandable.
(Image from)
In order to engage the audience throughout the film , the editor uses pace to draw the audience in. For instance you can create tension by starting of with slow paced shots and gradually build up until you get fast paced shots. This type of technique can often be related to horror films; which start to increase in pace when something shocking or unnerving is happening but gets the audience to stay. There is often a lot of low angle shots in horror to show the fear in the characters. The pace is often matched up with the distressing soundtrack that makings the audience feel nervous in their seats. This keeps the audience for horror fans engaged as they enjoy the tension created within the film/edit. A good example of this, is from the film trailer for "Orphan" which starts to include rapid cuts towards to end building up the tension of the film.
The pace of the film is often different for every genre, we have already looked at horror in some detail, so lets move onto to action films. In action we get lots of long shots to establish the scene ; then we get a series of rapid cuts to build upon the mass amount of action going on in the scene. The rapid pace gets the audience engaged as there is so much going on, that there will be something to please everyone. Some of the key moments in action films where there is rapid cuts are for fight scenes and chase sequences. Some key examples are:
The ending chase sequence, in the "Dark Knight Rises" which cuts through 4-5 characters experiences around and in the chase, whilst cutting to all the action. Another good example for action editing is the water tower scene from "The Expendables 2":
Which changes shots frequently to, vehicle action, the interaction between the two sides fighting and the physical action occurring within the film.
Finally lets look at the film genre of Romantic Comedies/ Romance. This genre serves a completely different audience to action and horror so the style of edit is also different. In order to keep this audience engaged, there are longer shots which reveal more about the characters than anything else. Within this genre there are normally 2 main characters, a man and a woman; through the film there journey is documented. In order to reveal emotions and traits slow paced cuts and shots are used to build upon the realism of the romance and interactions. Think of it has a complete opposite to an action film, as it is. Some examples of films are: "The Break Up"
Which uses long shots, to show the 2 characters arguing and builds upon the disagreement within the pair. This is a good example of realism and arguments go on for a long time and people often have a lot to say. So when each character is countering anothers statement they are seen on screen for a long time. Another good example is from the film "Knocked Up"
Overall, in order to keep the audience engaged think about the pace of film, in the genre of your film type. If you went to go an see an action film and you got lots of long cuts and shots you would get bored easily as it wasn't designed for it. Again if you went to a see a romantic comedy and you got lots of short cuts, you wouldn't find anything out about the characters and would lose the narrative of the plot. In general to keep your audience engaged think about your genre and editing very carefully. Audiences can also be engaged by being motivated, which I will talk in a section time.
Pace
We have saw how pace can be used to create tension and engagement within the audience. But how do we actual create pace? Generally speaking when the editor use a shot that is long in duration the pace is slow. Normally the slower the pace the longer the shot, the faster the pace the shorter the shot. A film can be made up of slow and fast pace shots, for example in Avengers there are slower paced shots when the heros are stood around talking. Although when the action/fighting begins the pace increases so the shot length is often shorter.
In this scene between Tony Stark and Loki we see lots of long shots, we show all the attention to the two characters. Which focus on their action and dialogue within the scene, there a conversation going on so we have the longshots to reveal information in the scene. So this scene is a slow pace, lets compare this to the start of the "Battle of New York"
After the introduction to the scene, through the use of the Hulks character the battle begins by him charging into the action. We see lots of shots in a short amount of time , with each shot focusing on what each character is doing. This is to cover the fact that lots is going on and in order to convey the message quickly lots of smaller shots are used to show how fast the battle is taking place. The use of a fast pace gives a sense of realism as it runs on a pace similar to a real battle.
To sum up in general, to create a slow pace use longer cuts and shots and to create a fast pace use short cuts and lots of them. The creation of pace comes from the cuts you use, meaning every film will have a different pace.
Motivating the Audience
Motivating is very similar to engaging the audience, although in this section we won't focus on the genre of film.
To motivate an audience means to keep the target audience to be emotionally interested in the film. This is vital as without a target audience you will struggle to make an income as no one will go and watch your film. In order to create a successful edit, you must edit with a purpose in mind and think about how it makes the audience feel. This can be done by cutting from one scene to another. I.E a character has just died in one scene and the next is his funeral. This would make the audience feel upset at heart as they haven't had enough screen time to mourn/ think fully about the death of that character. For example, in "The Dark Knight Rises" we as an audience think that Bruce Wayne has just died from a nuclear explosion whilst saving the city. Immediately after we see the person closest to him crying over his grave at his funeral. Which causes an knock on effect on the audience who know feel distressed and upset.
Note, this type of edit can also have positive effects such as a hero who was in a bad state after saving the day, now appears recovered and living his life as normal. We can also make the audience feel motivated by having he edit as natural as possible, caused by having shots cut at the right time. If a shot was too long when it wasnt meant to be the audience could pick up on it and no longer feel the realism of the film. Which has a knock on effect on our previous section , audience engagement. If the edit is done correctly it is easy to bring in a sub plot into the film without causing the two to be affected in an major way.
Within the editing you can sometimes hold back pieces of intel (information) that are important to the story arc. For instance we have a long shot of a busy bank. There is then a close up upon a character that appears innocent at normal glance. Then we cut to a shot of gun being held behind his back, as if he was going to shoot something. From this stage we, the audience, realize that this is no longer an ordinary man but a bank robber of some kind. Which is a perfect way of motivating the audience as it is revealing hidden details, that shocks the audience and causes them to start thinking in a different way.
(Image from:)
A good example of when this was used, was in the 1995 film, "The Usual Suspects" the plot in general is : "Following a truck hijack in New York, five conmen are arrested and brought together for questioning. As none of them is guilty, they plan a revenge operation against the police. The operation goes well, but then the influence of a legendary mastermind criminal called Keyser Söze is felt. It becomes clear that each one of them has wronged Söze at some point and must pay back now. The payback job leaves 27 men dead in a boat explosion, but the real question arises now: Who actually is Keyser Söze?" This plot summary comes from IMDb. Throughout the film the identity of the powerful Keysey Soze is a mystery.
(Image from)
Up until the very end of the film where there are shots of various elements of the myth. Such as a coffee mug with a made up name on , which had previously used as a lawyers name in a made up story by Kevin Spacey's character. Also a board full of characters and places, that had also been manipulated as part of a con. This piece of information could of been introduced at the start of the film, but what would be the fun in that? The editor cleverly puts this at the end so the audience will try and piece together the puzzle during the film.As they are receiving more and more hints throughout, which is aa ingenious way of motivating the audience.
(5:20 - 6:30 in clip)
The sound in the edit is also just as significant. If we had a scene where everything is normal, then suddenly a loud noise comes out of nowhere. The audience instantly tries to put together what and where the noise came from, getting them involved in the film as they try and predict the upcoming events. The source of the sound will then be located and will answer the audiences burning question of "What just happened?"
Creating real conversations / realism
Within films, conversations are portrayed as very realistic. This is down to the editor putting several clips together going from both characters in one shot, to having close ups to those who are speaking. It can also be done by having over the shoulder shots looking at the character speaking; it can also apply to a group of 3 people talking and uses similar techniques. This is known as shot reverse shot:
(using this TV example from. F.R.I.E.N.D.S)
We start off seeing both characters sat at the desk, we then move onto a close up on Chandlers face as the conversation carries on. As the other character begins to talk, the editor changes the shot to a close up of his face. This happens throughout the clip as when each character goes to speak, the shot focuses on them. The editor does this so the audience can easily follow the conversation and not get confused.
(clip from)
Using another example, we see the use of over the shoulder shots in a shot reverse shot scenario. If the editor just left one big clip of the two sat next to each other it would take away from the emotion in conversation. For example if the man in the clip was feeling angry, you would see it in his facial expressions and how he speaks. But having focus on two characters takes away from the empowering emotion evoked when the focusing on one character. Not only does this method used by the editor, make it easier for the audience; it also evokes emotion in the conversation. Which the audience understand and take in whilst watching.
Conventions/Theories of Editing
Not only did we develop how to edit film , over the many years we developed lots of conventions that helped us to edit in a variety of new and exciting ways. In this section we will also look at some of the pioneers in the conventions of editing.But what types of conventions/theories are used within the editing process. and why are they used?


Jump Cut
As described earlier, the jump cut was accidentally discovered when George Melies camera jammed when filming a bus, when it unjammed a hearse was in the shot instead as the bus had drove off. When Melies checked over his footage he saw the bus had transformed into the hearse, which he went on to use in his films as an early illusion/special effect. Melies had also introduced other features into the conventions of editing; such as: the fade in and out and the overlapping dissolve.

This creates the effect of moving in time as the camera has stayed in place whilst the subjects in shot change slightly. Due to the audience not seeing the change, it removes time normally created, giving the sense of sped up time . This convention is known to not follow the rule of continuity as the cuts are disjointed and skips forward in time, which is the opposite of continuity; which puts shots together to create a sense of time and space. This convention can be created by either editing two shots filmed at different times(with the same subject) together or removing the middle bit of the clip of one shot. A well know example that uses a lot of jump cuts is the Russian film "Man With a Movie Camera" by Dziga Vertof.
(Image from)
This creates the effect of moving in time as the camera has stayed in place whilst the subjects in shot change slightly. Due to the audience not seeing the change, it removes time normally created, giving the sense of sped up time . This convention is known to not follow the rule of continuity as the cuts are disjointed and skips forward in time, which is the opposite of continuity; which puts shots together to create a sense of time and space. This convention can be created by either editing two shots filmed at different times(with the same subject) together or removing the middle bit of the clip of one shot. A well know example that uses a lot of jump cuts is the Russian film "Man With a Movie Camera" by Dziga Vertof.
The jump cut is still used today and has been used in such films such as, Guy Riches "Snatch" and the "The Ring" by Gore Verbinksy. Even though it was still introduced as a simply cut for stage shows, directors carry on to use conventions like these in creative and inventive ways, in order to still shock audiences.
Edwin S Porter

In the start of the 1900's Edwin S Porter joined Edison's production company as head of production in the Edison Skylight Studio, located in New York. For 5 years he acted as a director and camera man for Thomas Edison. Porter took inspiration from Melies work in Cinema, so Porter attempted to make his own film. This resulted in the product of "Life of an American Fireman". He took footage from the Edison archive and his own scenes to make this film. As we discussed earlier we saw that there was lots of repetition in the film. "Because there was no idea of time, lots of the same actions are repeat. For instance in one shot we see the fireman go down a pole, but in the next we witness them doing it again but from the outside. There was no cohesion or continuity and it made the film unrealistic"
Another repeated action, was the fireman saving a woman from a burning building. The first time we see this is from the inside of the building as they are climbing out. . We then see the rescue again but from the outside, which dragged on as the inside scene happened again but we couldn't see it because of the shot. This wasn't identified by the audience as they were still amazed at motion pictures, but the conventions of editing started to change after this film.

Porter started to make an impact in the conventions of editing, in his next film, "The Great Train Robbery". His cuts are improved this time around and he cuts between the scenes without any transitions. He also cut scenes before the action had finished. For instance a train on a railway would be cut before it left the frame, in the next shot the train would come into the frame and carry on its journey. This could be counted as an earlier version of cutting on the action , as the action is finished off in the next shot. This also highlighted that was a film maker you could compress time for an impact rather than making the time in film realistic.
Porters work emphasized that it wasn't about what is within the frame, but the shot used. Specifically how shots are arranged. Although Porter had a small impact on the conventions of editing and would require somebody else to develop on his findings.
(Image from)
In the start of the 1900's Edwin S Porter joined Edison's production company as head of production in the Edison Skylight Studio, located in New York. For 5 years he acted as a director and camera man for Thomas Edison. Porter took inspiration from Melies work in Cinema, so Porter attempted to make his own film. This resulted in the product of "Life of an American Fireman". He took footage from the Edison archive and his own scenes to make this film. As we discussed earlier we saw that there was lots of repetition in the film. "Because there was no idea of time, lots of the same actions are repeat. For instance in one shot we see the fireman go down a pole, but in the next we witness them doing it again but from the outside. There was no cohesion or continuity and it made the film unrealistic"
Another repeated action, was the fireman saving a woman from a burning building. The first time we see this is from the inside of the building as they are climbing out. . We then see the rescue again but from the outside, which dragged on as the inside scene happened again but we couldn't see it because of the shot. This wasn't identified by the audience as they were still amazed at motion pictures, but the conventions of editing started to change after this film.
(Image from)
Porter started to make an impact in the conventions of editing, in his next film, "The Great Train Robbery". His cuts are improved this time around and he cuts between the scenes without any transitions. He also cut scenes before the action had finished. For instance a train on a railway would be cut before it left the frame, in the next shot the train would come into the frame and carry on its journey. This could be counted as an earlier version of cutting on the action , as the action is finished off in the next shot. This also highlighted that was a film maker you could compress time for an impact rather than making the time in film realistic.
D.W Griffith /Continuity

)
In 1908 Edwin S Porter hired, David Wark (D.W) Griffith as a lead in his film, "Rescued from an eagles nest". Which began his career in film making. Griffith work in writing his own plays and poems were poor, instead he focused on creating scenarios for films. Whilst doing so he used a stage name of Lawrence Griffith. One day he sent a scenario based on a play to Edwin S Porter, but was rejected. Instead he was hired as an actor for one of his films.
After this Griffith joined a company called Biograph as a director, which began his career in film making. In his job at Biograph he made over 400 films during the period of 3 years. The first convention of editing to be invented was the cut in. He put this technique in use, in the "Greasers Gauntlet". He cut from a medium long shot, to a wide shot focusing on the characters in the scene. He did this to emphasis the emotion/interaction between the characters. Which was a first in cinema history. He carried on using a range of shots in his films, to create a scene; this was later known to be continuity editing.


(Image from)
(Image from)
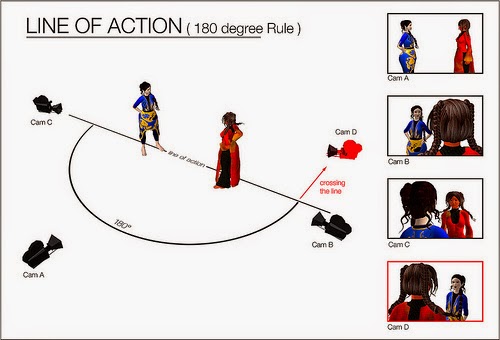
Continuity editing, is a type of edit where the sense of space and time continually flows thought the film. I.E a jump cut would not be used for continuity, as a jump cut moves forward in time rapidly and not in a smooth flow. Rules such as the 180 degree rule were created to help avoid breaking continuity within a film. Shortly afterwards he invented the cross cut/inter cut which cuts between shots from different scenes in a parallel fashion. This was first used in "After Many Years" , cross cutting was used to show a shipwrecked man and a women who he left at home. So there would be a mix of shots with him on the island, to her lounging around the house. This technique is still used within the industry today. and is used to great effect.
After all his films and experiments, they had brought forth several techniques/conventions:
After all his films and experiments, they had brought forth several techniques/conventions:
- Establishing Shot
- Cutting on Action (I.E a shot focusing on some one opening a door, will be followed with another shot still focusing on the door being opened until the action is complete.)
- Shot Reverse Shot
- Matching Eyelines
In 1911, Griffith began making his own films. It was the worlds most expensive film and was the first ever blockbuster. The film was called "Birth of a Nation", it was a controversial film which advertised the KKK clan in a positive light. The film used all the conventions created by Griffiths and was a great success.
He had took the comments of the film being racist personally and his next film in 1916 was titled "Intolerance". The original cut was around 8 hours long, but was cut down by more than half to 3 hours long.
This film cost a huge amount, in fact millions, but was a fail at the Box Office. Without Griffiths we wouldn't have the everyday conventions of continuity editing used in modern day films. As he was one of the pioneers who fully utilized the techniques and conventions coming into play.This film was a risk Griffiths took and although he carried on his career, he was still paying debt up until his death in 1948.
Soviet Cinema
Whilst Griffiths was working on create a sense of time within his films. Soviet cinema pioneers were working on other ideas. After years of Civil war within Russia the government needed a way to communicate with their citizens. They used the media, mainly film to do this. The country lacked sources of film making kit, so that they had belonged to a committee. The committee in mention was the New People's Commissariat of Education. They founded a film school as a method of educating those who wanted to be film makers. This shorted version of the school was known as the Moscow Film School.
(Image from)
This was the worlds first film school and had the purpose to train film makers; who would support the communist party/soviet union Bolshevik, With the focus being on propaganda for the communist party and the theory of film.
(Image from)
Luv Kuleshov /Kuleshov Effect
(Image from)
After the release of "Intolerance", the film was screened throughout the Soviet Union and began a massive influence. In Kuleshov's workshop , his study group at the Moscow film school, they would break down the film and look at how the order of shots had an impact on the film, To do this they would often change the order of the clips and test what the effect it had on the rest of the film.
Once film supplies started to pick up in Soviet Russia. Kuleshov started testing things he had learnt from his experiments with "Intolerance". This was known as the Kuleshov effect, he took a shot of a face with a blank expression and paired it with 3 different shots. One with a bowl of soup, the next with dead women in a coffin and one with a promiscuous women on a sofa. The audiences loved the way the actor changed his expression depending on the stimulus. They thought that the soup shots displayed the characters hungry when looking at the soup. The look of mourning after losing someone deer to him and the lust whilst looking at the half naked girl.
(Image from)
Although, Kuleshov knew the shots were identical. The audience could pull apart emotion from the scene depending on the shots around it. Kuleshov used other experiments and found out similar results the order of the shot, evoked a series of different emotions. Although others were already doing this, Kuleshov pulled it apart as a theory. This allowed Kuleshov the make his point of, the film was made in the edit.
Here is an video of Alfred Hitchcock, a famous film director explaining the Kuleshov effect:
In this example of the Kuleshov effect in use, we can tell that the character is not looking forward to do something and looks bored, next is a shot of a note pad and pen, So as an audience we can infer that the character does not want/isn't looking forward to working.
Soviet Montage Theory
Soviet montage works by placing different shots in a certain way to evoke an emotion or feeling. With the literal meaning of the word (French verb monter) meaning to assemble. The idea of Soviet Montage came from a brief student of the Moscow film school, Sergei Eisenstein .
(Image from)
He was one of the early pioneers in cinema along with, D.W Griffith. Instead of making progress by getting involved in practical experiments, Einstein did all his work based around theory. He also broke free of time and space and focused on his own cinematic language. The one of the groundbreaking films released by Eisenstein was "Battleship Potemkin" , it ran for 86 minutes long and took two weeks to edit, with a final shot count of over one thousand. He used his theory of montage to create a response from the audience. It was that good, it was said that anyone would want to join the soviet union.
The reason for its big success was the editing which helped make Eisenstein make a huge contribute to cinema. He saw montage as a way of evoking a series of ideas that would link together, to create a series of themes within a film. Eisenstein believed that editing could have a longer effect that being used for one scene. He thought that the "Collision" of shots could trigger emotions within the audience to create metaphors. One of the ways he did this was by juxtaposing (making opposite) two different shots. Eisenstein also came up with 5 types of montage:
(I will include a video with examples at the end)
- Metric Montage - Cutting on the length of the shot, which helps with tempo control, used for an effect.
- Rhythmic Montage - Like Metric but also focuses on the action in shot.
- Tonal Montage - Uses the lighting and shadows of the frame.
- Over-tonal Montage - looks at large sequences put together and what effect they have.
- Intellectual Montage - Expressing abstract ideas by contrasting visuals.
But how do these types of montages get used in everyday films? Here is examples of all 5 of these types being used:
If we take the example of " Strike" which is also directed by Eisenstein, I will now look at the clip in detail. The type of montage used within this scene is intellectual:
As the Sergei Eisenstein is using the slaughtering of the bull as a visual metaphor. It represents the treatment of the hard working worker who were helpless at the time. As in the clip the Bull is easily controlled and is killed under the power of the merciless authorities.
Cross Cutting
We looked at cross cutting as part of the continuity section. But as a reminder, cross cutting is a technique used to create simultaneous action that occurs in different locations. I.E putting shots of two action sequences together as if they are happening back to back. This may also be used for phone calls, showing the physical reactions of the characters.
(Image from)
(This image is taken from the film, Phone Booth)
We have already saw how the old film makers would use this technique, but is it still used today? Absolutely, cross cutting is one of the most used techniques in modern day films; as it sets up sub plots within film. Here is an example of cross cutting in Christopher Nolan's film " Inception".
Throughout the scene we see a mix of the Van chase, whilst cutting to the action in the dream world. This creates a unison as the action in the dream world is one of the characters in the Van; so in that sense it connects both actions together in a logical way. NOTE, not all cross cuts happen at the same time, although it is the common approach.
Montage
Unlike the Soviet method of interpretation, you can tell when a normal montage is taking place, they also don't reveal any hidden information. Think of it as a replacement for a text screen moving through a story. For instance a "after a series of dates" title card could be reduced to a series of clips from each date put into a sequence. This occurs in film "The Naked Gun" which goes through a series of comical shorts that condenses all the fun moments the couple have shared. Music is often played over the top of a montage and carries the sequence through.
In a simple definition montage is a technique that condenses down time and space through a series of short clips, which have been edited into a sequence. Older montages use to use over the top transitions to go along side with the music and visuals. Although that technique is not used as much today.One of the most famous montages is from the feature film "Rocky"
This montage focus's on portraying all the training Rocky has done in order to prepare for his fight. Its used instead of simply putting a title screening "After Rockys intense training..." a visual is used instead to show the quick passage in time. Here is a comical way of summing up a montage and why we use them:
Cutting to a soundtrack
Cutting to the soundtrack means the editor will cut to the pace of the song. If the soundtrack is fast paced then the cuts are going to be quicker and vice versa. This will then set the overall motivation of the scene. Lets take a look at a scene from "The Great Gatsby"
Upon the first glance of the Gatsby Mansion the soundtrack begins to fully start at 1 minute 19 seconds. The scenes in the soundtrack section are cut to a faster pace than the beginning of the clip. This not only proves that editing to a soundtrack can create a deeper meaning. As the faster cuts could represent the excitedness of Daisy as she witnesses the mansion first hand, until she becomes overwhelmed and breaks down. Which in hand creates greater motivation for the mansion scene, compared to shots before and after.
In another example , in "The Hunger Games" after the death of Rue the soundtrack starts to play. The song is titled " Rue's Farewell" and is a very slow paced song, so the cuts are rare and allow for longer clips. This is a great effect for this scene as the long cuts draw out the emotion of mourning for Katniss, after witnessing the death of a child.
This technique can be used for every genre and brings out a whole series of emotions. In this case, in the film "Fast and Furious" the soundtrack is very fast paced and so are the cuts. This works in hand for the scene as a chase takes place. The fast cutting and the fast soundtrack link to the frantic and action packed scene. All of which combine to draw the attention of the audience as they are currently filled with adrenaline/ on the edit of their seats.
Shot Variation
Shot variation is a convention/ technique used, so that the audience gets a better understanding of what's going on. Shot Variation also helps build upon the idea of continuity as we get a better understanding of time and space through multiple shots. By placing the different shots together it builds up a sequence, which if done right will flow together smoothly. Most scenes start off with an establishing shot to get an idea of where we are in terms of location.
(1:15)
In the opening sequence of "Anchorman 2 : The Legend Continues" we start off with an establishing shot of New York city. This instantly reveals that we are in America, which sets up the tone for the rest of the film. Once the audience knows where they are, they can start to fully imagine the scene the film is setting.
(Example of a typical Establishing Shot)
(Image from)
Straight after this we see a wide shot, which is typical used to introduce a character. In this case, we are re introduced to Ron Burgandy and Veronica Corningstone who appeared in the first film. This also gives a sense of the people around them and give a brief overview of the clothing of setting. From this we can gather that is is the 80's from the style of clothing.
The next shot is a medium shot, which is used in this case to move in closer to the characters. A medium shot is normally used in dialogue or action scenes which assist the audience to follow the plot.
Last of all we get a close up of the characters, which focuses on the facial expressions of characters. In this shot both characters appear to have a smile on there face, which means there everyday lives are great in this moment of time. All of which we have learnt in the first 12 seconds from the establishing shot.
(Image from)
The use of shot variation also gives the audience more to look at. If you had a film that was from the same angle for 90 minutes, the audience would turn off and lose attention. Where as if you constantly change the shot and introduce something new , or show off facial expressions then the audience has lots to look at. Here is a visual representation of all the shots.
(Image from)
Matching Eyeline
Matching Eye-lines is an editing technique that helps create continuity. The technique is based on the idea that the audience want to see what characters is looking at. An eyeline match begins when a character will look at something that isn't in shot. The next shot we see is the object/person/thing the character is looking at. The second shot is from the POV (point of view) of the character and makes the audience involved/engaged as they are seeing the object through the eyes of a character.
(Image from)
(From the film Stendhal Syndrome)
This technique is put into full use, in Alfred Hitchcocks film, "Rear Window". Which follows the story of L.B "Jeff" Jefferies, who is stuck in his apartment due to a broken leg. In the film we get to see several things out of his window from the POV of Jeff as he stares out his window. The technique is used throughout the trailer, with each direction he looks , somebody new is introduced.
For instance, in the trailer we see Jeff look down at " Miss hearing aid" who is an artist. What is interesting about this is, as he looks down we are followed with a high angle shot of the women. As if he is actually looking down. This highlights that you can't cut to any old shot to go with the close up of a face; as the angle may not match. Which in turn would break the illusion of realism in the film.So when a matching eyeline is set up the angle and direction of the head, must match the close up of the object.
(Image from)
Eyeline matches are also used in conjunction with shot reverse shot and the 180 degree rule. As the angle of the heads must match at the person they are looking at. Otherwise, the illusion would break like it would if it didn't match for what a character is looking at.
Use Of Dissolves
A dissolve is a transition that is placed between clips in the editing process. A transition shows the movement from one clip to another, unlike the simple edit. A dissolve is a gradual change from one image to another, generally the use of a dissolve indicates a large amount of time has passed. But this may not always be the case. The length of a dissolve is set by the mood and pace the editor and director want to create within the film.

(Image from)
Here is some footage that is mid way through a dissolve. Which reveals that the dissolve will make a fade in/out appear at the end of a clip and at the start of the next.
Instead of being used as a passing of time, dissolves were often used by early filmmakers to convey a deeper meaning. For example in the film "Citizen Kane" directed by Orson Welles; we see a dissolve from an iron gate protecting the the Axandu mansion to cage of monkeys, with a gloomy castle in the background. The use of the dissolve and conveys a meaning without using dialogue. In this case the hidden meaning is that Kanes dream house is in fact a suffering prison for the innocent. Throughout the opening scenes dissolves are used to show the sinister and darker sides of the mansion, from empty and desolate golf courses to a gothic themed mansion.
This can also be said for Alfred Hitchcocks "Psycho".
At end of the famous shower murder scene, the victims blood is seen to be mixing with the water and leaving through the plug hole. This is to be seen, as her life literally "going down the drain". By putting a dissolve onto the shot of the plug hole and the next of a close up of the eye. Creates the idea that the two shots are linked. In this case its that her eyes have become as empty as the "black hole" which is imagery for the water spiralling down into the draining.
Although, dissolves are not used as frequently as they were in the past. An example of where dissolves have been used in the modern day is the Indiana Jones series. Although they don't add to the narrative,we dissolves being used to turn the paramount logo into various mountains, for instance in the first Indiana Jones the logo dissolves into a mountain in Puru. Which is a nice way to start the film as it gently eases into the narrative.
This technique was carried forward into all the Indiana Jones movies, even in "The Kingdom of the Crystal Skull" which turned the paramount logo into a mound of dirt.
Cutting On Action
Cutting on action is an editing technique, where an editor will cut from one shot and will match the action in the next shot. Even if the shots were filmed days apart, because of the way they are edited it creates an impression of continuous movement. If done correctly the audience won't notice a cut and see it as one fluid motion. Which is why cutting on action is another technique used to help create continuity.
This technique normally occurs during the middle of the action as it makes way for a seamless edit. Here is an example from the 1938 film " Bringing up Baby " directed by Howard Hanks.
(0:23 - 0:24)
For the first 23 seconds of the clip we see the scene from the same shot. But when Susan pulls a lit match towards her cigarette we get a cut. Into a new shot of Susan bringing the lit match to the end of cigarette, lighting it. The fluidity of the clip gives no reason for the audience not the be amazed as it has been edited perfectly; with a cut on action. Making it impossible to tell that the shots were filmed apart.
Another example of a cut on action, is from the film "The Matrix", directed by Andy and Lana Wachowski.
Throughout the scene there are lots of cuts to action during the fights scenes. In one case Neo jumps up into the air, the next shot shows the final stage of the jump and shows Neo kicking the guard in the face. Another shot then focuses on his moving feet and the falling guard. Until a final shot of the guard hitting the floor and Neo returning back to the floor.
(2:44 - 2:48)
Shot Reverse Shot
Within films, conversations are portrayed as very realistic. This is down to the editor putting several clips together going from both characters in one shot, to having close ups to those who are speaking. It can also be done by having over the shoulder shots looking at the character speaking; it can also apply to a group of 3 people talking and uses similar techniques. This is known as shot reverse shot, which is a typical Hollywood style type of continuity editing:
(using this TV example from. F.R.I.E.N.D.S)
We start off seeing both characters sat at the desk, we then move onto a close up on Chandlers face as the conversation carries on. As the other character begins to talk, the editor changes the shot to a close up of his face. This happens throughout the clip as when each character goes to speak, the shot focuses on them. The editor does this so the audience can easily follow the conversation and not get confused.
(clip from)
Using another example, we see the use of over the shoulder shots in a shot reverse shot scenario. If the editor just left one big clip of the two sat next to each other it would take away from the emotion in conversation. For example if the man in the clip was feeling angry, you would see it in his facial expressions and how he speaks. But having focus on two characters takes away from the empowering emotion evoked when the focusing on one character. Not only does this method used by the editor, make it easier for the audience; it also evokes emotion in the conversation. Which the audience understand and take in whilst watching. Whilst this is being done, it follows a rule called the 180 degree rule and is an example of matching eyelines. As it is presumed both characters are looking at each other.
180 degree rule
(Image from)
The 180 degree rule is, a way of creating continuity, used when 2 or more characters are interacting. For instance if two characters were talking, like in the picture above, you would draw an imaginary line between the pair. This line is known as the "axis of action" The camera is allowed to move along the bottom of the line but not along the top as that would break 180 degrees. A normal set up might be 3 camera set up 60 degrees apart. This is down to the idea that we want to get the actor looking the same way on camera so the audience can follow what's going on.
(Image from)
In this 3D model of the 180 degree rule, we get an idea of how the rule is portrayed in a film. As we see the wide shot in camera A, then the mid/over shoulder shots of the characters in conversation. We then see a visual of camera D and can already tell the girl in the red is out of place, as before she had a behind shot on the right hand side and not the left. The term used for not following the 180 degree rule, is "crossing the line". Filmmakers can accidently do this , or do it to create an effect. Lets take a look at film that contains a break in the 180 degree rule:
Within the first couple of seconds on the clip from Stanley Kubrick's "The Shining" we see the back of Jack Nicholson character, although in the next shot we see the front of him. This is instantly noticeable but was the rule broken on purpose? As "The Shining" is a psychological horror, Kubrick could of directly done this to his favour , to disorientate the audiences perception and bring them into a world where the rules have changed. Thus being a prime example of how breaking the 180 rule can be effective, although breaking the rule can also be a really bad thing.
(1:50 - 2;00)
As we see in this clip, having the characters out of place makes the clip look shoddy and unrealistic. Not only can this get the audience confused, it horrible ruins the perception of reality. This time lets look at an example from a short film series "Ten Little Roosters" by Youtube content creators, Roosterteeth:
(4:08 - 5:04)
The scene starts off by having the character Barbara walk into the room were Gus is sitting. We then get a wide shot of the two sat at their desks. We then see some over the shoulder shots of each character with there eyelines directed at the other. With one following an eyeline to left and the other to the right. The shots remain the focus on the conversation and nothing else in the room, the only shot of the room we see is we Barbara walks in. If we had a shot of the back of both characters heads then this would break the line. All these factors cause no breakage of the rule and creates a real conversation in the audiences mind.
When we do follow the rule, it is really effective as it creates the sense of a real conversation on screen. At the start of the scene, a wide shot is normally used to begin the conversation often from camera 1 on the diagram. During the remainder of the scene, cameras 2 and 3 will be used as the conversation goes back and forth. An axis of action or a "line" can change during a scene, although it MUST be shown in one shot as it sets up a new line. If you suddenly cut to a new shot without the swift transaction, then it counts as crossing the line. So in order to create continuity and realism, stick to having all your shots from the same side as the line.
End of Chapter
Extra - Chaos Cinema
Chaos cinema is the idea of going against continuity that early filmmakers established as "Classic" cinema. In "Classic" cinema every cut is chosen for a reason, the clips are also placed together so they keep a spatial relationship with the place the characters are in. But over the years of keeping to continuity and careful editing a new form of cinema is emerging, "Chaos Cinema".For instance if we take a look at "Indiana Jones - Raiders Of The Last Ark":
The famous opening scene fits perfectly with the description of "Classic" cinema. Every cut creates a meaning and follows a sense of time and space. In every shot something new is revealed which builds upon the story. Although a series of frantic events is occuring the editing sticks to the ways of cohesion. Each shot is clear and well framed, the camera is also mainly still so all the movement follows the character. For instance, even though the editing is quick we see Indy grab a vine, he then only slips after we see the vine come loose in a different shot. There are also lots of cuts on action. we merge two shots together keeping the sense of time and space.
This film, like many other action films follow this style of cinema. This style lets the audience know where they are and whats going on in the scene is a nice and simple way. Even if the content of the film was complex, the plot was still easy to follow. This style of editing can also be seen in "Die Hard", directed by John McTiernan.
(2:17 - 2:40)
Although we are witnessing a frantic fight scene, the audience can easily follow the action without getting lost. This is because the edit has been carefully done, whilst selecting the best clips to put together. Again lots of still camera work is used as we see the movement of the characters. The use of cutting on action like Indiana Jones, it creates the sense of cohesion.
Although, modern day action films seem to have done the opposite. Instead of making the careful cuts commercial films seem to go for the messier approach with rapid editing. This can also be related to "Intensified continuity". Although Intensified editing is a more updated form of classic cinema and helps keep the viewer oriented.In Chaos Cinema, We often see shakier camera movement and more shots focusing on the destruction of objects rather than creating a sense of space and time. A really good example of this is from the movie "Expendables"
Once the action kicks in, the pace begins to pick and a series of shots are mashed together. Instead of showing a lead up to a fight between the pair, lots of cross cuts are used to show them suddenly fighting. We also lack a sense of spatial relationship, as when Sylvester Stallone's character suddenly runs into shot a truck randomly appears. Every shot in the scenes runs of adrenaline and scenes that might have been built up to in classic cinema, suddenly unfold in a matter of seconds.
It can also be said that the soundtrack used with the scene is more important than the cut in this style of film making. As the soundtrack carries the adrenaline and action through. Directors seem to care less about where we are, but what is happening instead. The sequences becomes chaotic with the rapid cuts and high intensity soundtrack. Directors such as Michael Bay and Christopher Nolan are prime examples who use this style of editing. For example in Bays "Bad Boys 2"
Whilst the action is fine to look at, the mix and match of the shots its hard to pull out a narrative. The shots are also seen to be shaky and still shots appear to be blurry to add to the disoriented feel. We have a faint idea of what is going on due to , again. the soundtrack. The sound design often increases in quality as the edit decreases. The gaps left by the visuals are often filled with realistic sound effects that make up for this. This style of edit came around after the audiences attention span lowered and the endless benefits of using CGI. The main thing to take away from this, is that chaos cinema isn't about making it clear for the audience; but to create excitement within and to get the audience's senses as dramatic as possible.
Here is a breakdown for the chase sequence in the "Dark Knight" by Christopher Nolan:
Although the credibility and facts of the guy doing the breakdown, the video offers some interesting insights to how chaos cinema is created. As a sequence we think looks visually nice and pleasing, the actual editing of the clips is a mess. With all concepts of cohesion thrown out of the window. But by the use of the soundtrack, it holds the scenes together and carries the audience through.
No comments:
Post a Comment